You dropped a 480px logo into a banner slot that wants 1400px, and now the edges look like they were drawn underwater. Or you shrank a 4000px camera file down to 800px for a product listing and the fabric texture turned to mush. These are two completely different failures, and the fix for one will not help the other.
Downscaling throws information away. Upscaling has to make it up.
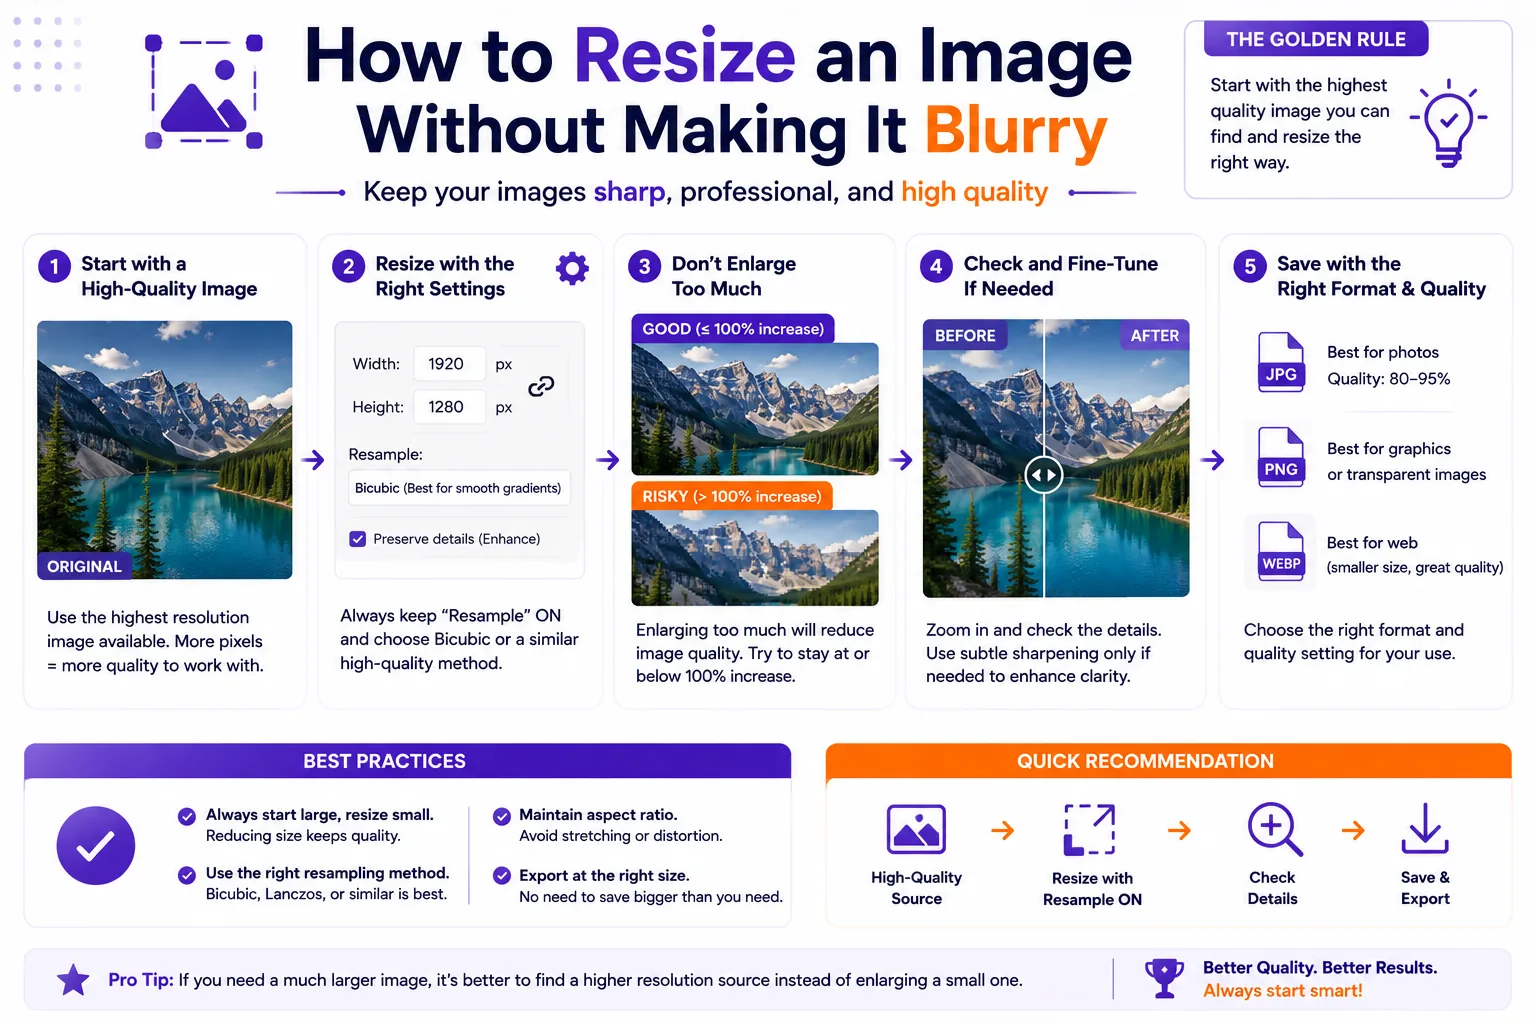
Going from 2400×1600 down to 600×400, sixteen source pixels become one. The resizer averages them and discards the rest. Lossy, but safe: everything in the output came from something that genuinely existed in the input.
Upscaling is the opposite. Going from 600×400 to 2400×1600 means one pixel becomes sixteen, and nothing in the file says what those fifteen new pixels should be. The resizer guesses by interpolating between neighbours, and interpolation between neighbours is, definitionally, a smooth ramp. Smooth ramps where edges used to be is what "blurry" means.
The honest headline: you cannot resize an image up without making it blurrier. You can only choose how the blur is distributed.
What the resampling filter actually does
A resampling filter is a rule for deciding how much each nearby input pixel contributes to each output pixel. The differences between them are real and visible.
Nearest neighbour picks the single closest source pixel and ignores everything else (Pillow's own description). No blending at all. On a downscale this is destructive, it literally drops most of your pixels, but on an upscale of pixel art or a QR code it is the only filter that keeps hard edges hard.
Bilinear blends a 2×2 neighbourhood with linear weights. Fast, and always slightly soft, because a linear ramp has no way to overshoot at an edge.
Bicubic uses a 4×4 neighbourhood with a cubic curve. The curve can overshoot slightly at edges, which reads to the eye as sharpness. This is the default in most editors and it is a reasonable default.
Lanczos is a windowed sinc function, the theoretically correct reconstruction filter, truncated so it is computable. Pillow calls it the slowest and highest quality. It produces the crispest downscales and the most visible ringing (faint light/dark halos) on very hard edges.
Mitchell–Netravali is a tunable cubic family with two parameters, B and C; the authors recommended B = C = 1/3 as the compromise between blurring and ringing. If your tool offers "Mitchell", that is what it means. It is a good choice when Lanczos ringing bothers you.
What I measured
I generated a 2400×1600 synthetic test image in Python containing a 48-spoke radial star (very high frequency detail), a random-noise texture patch, 3px horizontal rules and small text, then downscaled it to 600×400 with each Pillow filter and saved at JPEG quality 90. Two measurements: variance of the Laplacian as a sharpness proxy, and RMSE against a true 4×4 block average, which is the mathematically exact answer for this particular reduction.
| Filter | Laplacian variance | RMSE vs exact average | JPEG q90 size |
|---|---|---|---|
| Nearest | 25,355 | 27.72 | 86,719 B |
| Bilinear | 3,874 | 6.98 | 54,272 B |
| Bicubic | 5,722 | 4.21 | 58,859 B |
| Lanczos | 6,507 | 4.12 | 60,638 B |
Nearest has the highest "sharpness" score and the worst accuracy. That is the signature of aliasing: it is not preserving detail, it is manufacturing fake high-frequency noise out of a pattern it undersampled. That fake detail also cost 43% more JPEG bytes than Lanczos for a visibly worse image. Bilinear is the softest honest option, Lanczos the sharpest, bicubic a close third.
The practical upscaling ceiling
Same test image, downscaled with Lanczos and then blown back up to 2400×1600, measuring how much of the original Laplacian variance survives:
| Upscale factor | Detail retained |
|---|---|
| 1.5× | 9.6% |
| 2× | 3.7% |
| 4× | 0.4% |
| 8× | 0.1% |
That curve is why the working rule of thumb is that 1.5× to 2× is the ceiling for classical upscaling on anything with fine detail. Beyond that you are not enlarging an image, you are enlarging a blur.
Filter choice barely helps. On the 4× upscale, bilinear scored 38, bicubic 48 and Lanczos 51, all under half a percent of the original.
AI upscalers change the rules, and the trade-off
Modern super-resolution models do something different: instead of interpolating, they synthesise plausible texture learned in training. It is the only thing that works at 4× and beyond.
Be clear about what you are getting. The SRGAN paper that started the current generation states that super-resolution is an "ill-posed... underdetermined" problem, and that its method deliberately trades pixel-accuracy metrics for perceptual realism. The model produces texture that is convincing, not texture that was there.
Fine for a hero image or a background. Not fine for a licence plate, a serial number, a medical image, or anything a person will make a decision from.
Almost every downscale needs a touch of sharpening
Any averaging filter attenuates high frequencies, so a correct downscale is always slightly softer than the source at its new size. Sharpening afterwards is compensation, not cheating. From the same test, unsharp mask (radius 0.6px, threshold 3) applied to the Lanczos 600×400 result:
| Unsharp amount | Laplacian variance | JPEG q90 size |
|---|---|---|
| None | 6,507 | 60,638 B |
| 50% | 8,639 | 64,387 B |
| 80% | 9,649 | 66,032 B |
| 150% | 11,925 | 69,606 B |
The source image scored 11,353. So 150% pushes the small version past the original's edge contrast, that is where halos start. 50–80% at a small radius is the useful band, and it costs about 6–9% in file size.
Order matters: resize first, sharpen second, always. Sharpening before a downscale just gives the resizer halos to average.
Screenshots, line art, logos and text behave completely differently
Photographs are continuous-tone: edges are already a few pixels wide, so smoothing them slightly is barely noticeable. A UI screenshot has 1px borders and hinted text, and no amount of sharpening brings a 1px line back once it has been averaged across two rows. Three rules follow:
- Never resize a screenshot to a non-integer fraction. 50% and 25% are survivable. 63% is not. Retake the screenshot at the size you need, or crop rather than scale.
- Logos and icons should not be raster-resized at all. Go back to the SVG or the vector source and export at the target size. If you only have a PNG, upscaling it will look bad at any setting.
- For pixel art, use nearest neighbour and integer multiples. Upscaling a 32×32 sprite to 512×512 in my test kept exactly 4 distinct grey levels with nearest and produced a 3.3 KB PNG. Bilinear turned those 4 levels into 241 and the file into 105 KB, a blurred smear that is also 30× larger. On the web,
image-rendering: pixelatedorcrisp-edgestells the browser to do the same thing.
The DPI field does nothing to on-screen sharpness
Setting "300 DPI" in a resize dialogue, without changing pixel dimensions, changes a metadata tag and nothing else.
I saved the same 1200×800 image three times with the DPI tag set to 72, 300 and 1200. All three files were 572,898 bytes, all three 1200×800 pixels, and the MD5 of the decoded pixel data was identical (5cf22c86ee30…). The PNG spec describes this field as the "intended pixel size and aspect ratio to be used in presenting the image" (W3C PNG specification), a hint for print, not a property of the image.
If a print shop asks for 300 DPI, they are asking for pixel dimensions: a 6×4 inch print at 300 DPI means 1800×1200 pixels. Multiply inches by DPI. That is the whole calculation.
Starting size → target size → what to do
| You have | You need | Do this |
|---|---|---|
| 4000×3000 photo | 1200×900 web image | Lanczos or bicubic, then unsharp 50–80% at r≈0.6 |
| 2000px photo | 1000px (exact 50%) | Any decent filter; exact halving is the easiest case |
| 800px photo | 1200px | Accept it, or reshoot. 1.5× is the honest limit |
| 600px photo | 2400px | Classical resize will fail. AI upscaler, and only if invented texture is acceptable |
| Screenshot at 2× | 1× | Scale to exactly 50%, no sharpening, save as PNG |
| Logo PNG | Any larger size | Do not resize. Export from the vector source |
| 32px sprite | 512px | Nearest neighbour, integer multiple only |
| Any image | 6×4in print at 300 DPI | Get to 1800×1200 pixels. The DPI tag is not the job |
Before you hit resize
- Which direction? Down is safe, up is a compromise.
- Photo or hard-edged graphic? Different rules entirely.
- Is the target an exact fraction of the source? Make it one if you can.
- Downscaling: Lanczos or bicubic, then a small unsharp pass.
- Upscaling past 2×: stop, and find the original file instead.
For the common cases, product photos down to a marketplace's required dimensions, or a screenshot halved for a doc, a browser-based image resizer handles it without the files leaving your machine, which matters if the images are contracts or ID documents.